
My printing falls into 3 categories: index, edit – work, finish prints
I print as record for my own review. These are the contact prints – my index prints; those things used to locate a negative. These sheets are labeled with such things as date and sequence number. The negative number is written onto the back of the edit and work prints. It is also written in my darkroom book. These prints are made on RC (resin coated) paper; it dries quickly, flat, and can be written on with “china,” or grease markers.
Most of my prints are made after reviewing these contact sheets. My first steps are to make enlarged edit prints. These prints are pinned to walls, or strung up on lines so that I can live with them; re-arrange them. In other words edit them. At this stage, I estimate cross talk and altered, interacting interpretations
My edit/review prints may be on RC, although they will probably be printed on FB paper; perhaps even on several different papers. If something keeps taking me back to the print but the one(s) I’ve made aren’t satisfying me, I will mark the index print even more — “THIS” and move on. I have come back to some pictures years later. Some things I have given up on. These are never because of a technical problem. Everything makes a print of some sort.
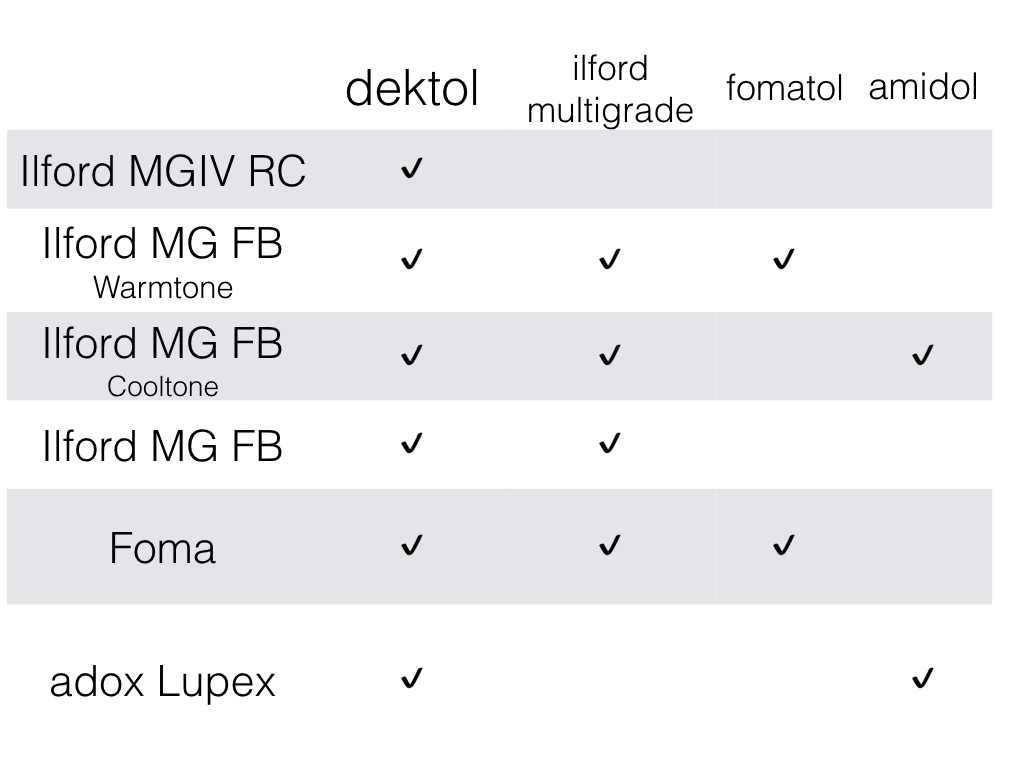
At last comes the finish print, always on fiber paper. These prints are most often made on Ilford Multigrade or a Foma paper. Over the past year, I have added Adox Lupex for contact prints from large camera or enlarged digital negatives. This paper is a chloride paper that I’ve written about in another post. Finish prints are marked (in soft pencil )on the back with the date of printing and a sequence number if needed. In my printing notebook, I write information by date; therefore, by looking at a print I can get back to the negative and any print notes I may have made.

2 thoughts on “Pipeline to Prints: Darkroom”
Comments are closed.