
flash and bump exposures in the darkroom
Photography is a compression algorithm; a form of making smaller, of reducing without losing meaning.
The Hard Scenes
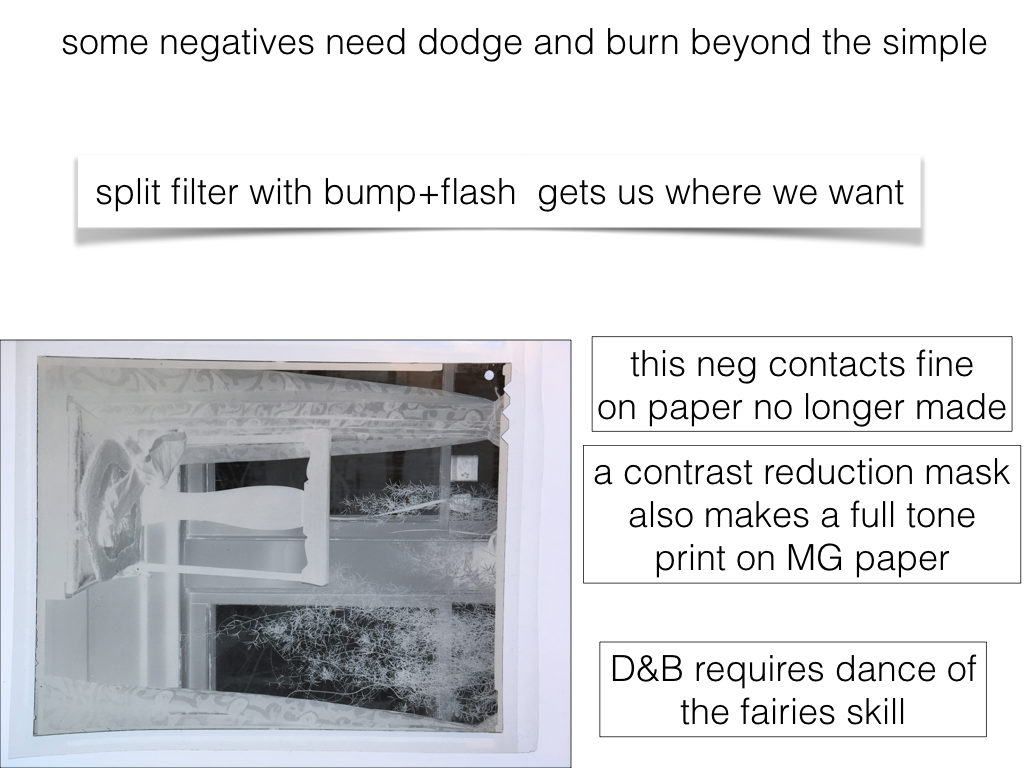
snow, big blank grey sky, interiors with bright window – these are challenging for the tone, the detail as meaning art practiced by most photographers. Photographers pride themselves early in their efforts in bringing ‘detail’ to art- details are the truth, but a devil to manage.
Photography is always a demonstration and an example.
Pre flash’increases’ sensitivity – gets the exposure started
Post flash ‘decreases’ contrast – adds (visible) tone to the highlights. Shadows are also affected, but those at maximum black can’t get darker. The deep grey shades are darkened, but this may not be noticed, or important to the image effect.
In general viewers respond in stages to the picture. First, they see overall object, with inspection they move to detail – most people approach pictures with notions based upon their ability to produce, therefore they are naive, taking cues from their “what is it” approach from pre-school life. With maturity they can move beyond what can be done by them; beyond hand waving or finger pointing.
pre-exposure and post-exposure. We mean non-image producing exposures; those made without a negative in the light path. I was taught that they were called:
- bump: those pre-exposures which raise the sensitivity of the emulsion. overcoming the ‘inertia’ – lazy halides are awaked just before ‘dawn’
- flash: those post image exposures. lower the contrast of the emulsion. this drops the highlight down the the curve
With bump raising the shadows up the curve, and flash lowering the highlights down the curve, we get a longer straight line image; more linear. This linear image is what a digital sensor provides. Straight line, not S-curved response.
Burning in the highlights, those dark negative areas, may take many hits of the timer. They also may seem to never bring out image detail. This is the opportunity to bring out more filters with multigrade paper. It also may signal the need for “bump” and/or “flash,” exposures.
The exposure light is most often the enlarger light; just remove the negative – fiddle and go. You can also use a small penlight, or digital controlled led like those made by RH. The color of the light has some effect, but the key use of a color flash is to hit a Red safe emulsion with an OC filter safelight. This is a very effective highlight pickup. Slavich paper, and litho film, exposed for 30 seconds to an OC filter at 3 foot drops almost another grade of contrast, most visibly in the highlights – perfect way to bring in detail that is difficult to burn in without that tattle tale grey featureless tone.
I’ve tested the color of light used for multigrade and have been unable to measure significant difference to 0 or 5 filters. Some, but not enough to warrant the change. Instead I usually bump with the filter I’m going to first expose with, and flash with the filter I just exposed with.
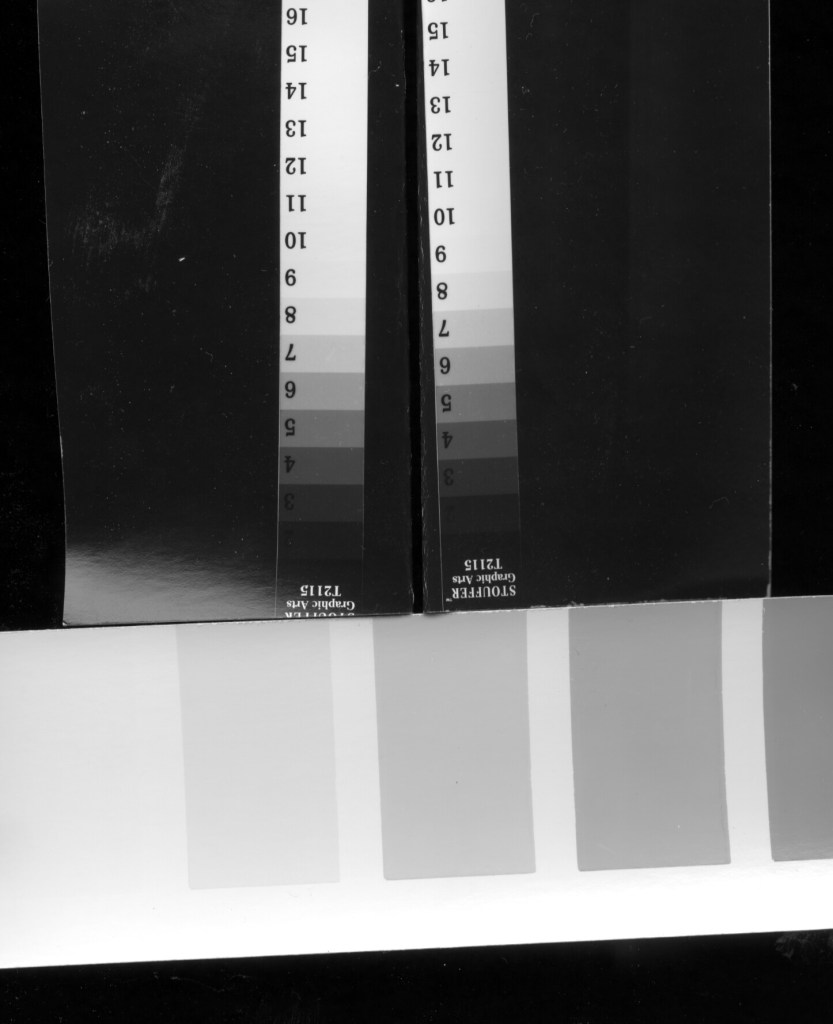
How Much: using Ilford MG fiber paper base exposure of 8 seconds, a 3X burn-in was replaced with a 3second ‘bump’ and a 5second ‘flash’ – giving details in the highlights that the burn hadn’t given. In other words 3 burns was just a waste of non-image forming exposure. The bump and flash equal to one burn provided image definition in the highlights. This process also made the edition of prints easy, and repeatable.
A Digital Way
With a digital process, the flash/burn doesn’t happen – isn’t used, since changing numbers is done in other ways. Ways such as luminosity masks; tonal overlays; local mask with additional manipulation. Even pulling into one image elements from different exposures. This can be done using dedicated HDR tools, or blunt force select, adjust, copy, paste actions.


You must be logged in to post a comment.