Watkins Factor: developing

Time of first appearance as estimator of developing time for that emulsion in that developer.

In re-working information about Deep/Thick vs Thin emulsions… da-net posers made me do it.

Deeper dive into Time-Temperature of photography.

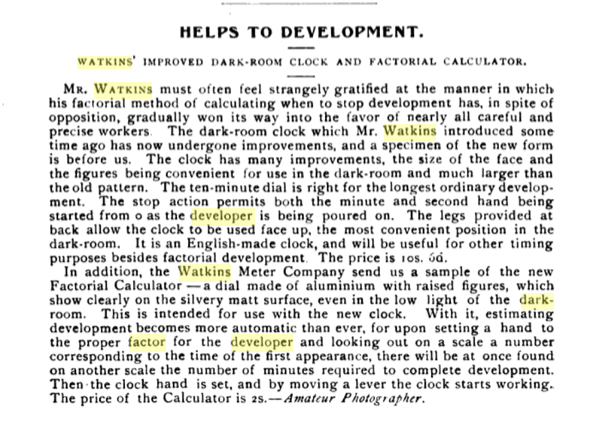
  • Watkins
  • Sheppard and Meyer
  • Clerc, section 400, the influence of temperature
  • Clerc, section 380 & 381, watkins factors, & combined factors

How Does It Work?

Developing is a process of saturating the emulsion; surrounding the exposed material with fresh developer, then moving exhausted developer. This main process is agitation. The key part of the emulsion is the gelatin. Think of the emulsion as having depth, as well as surface. This emulsion, whether film or paper, has to absorb the fresh developer– this takes time. An induction time. How fast the exposed silver begins developing depends upon the strength (developing power) of the developer. It is affected by temperature, emulsion, etc, but the main factor was the developing agent(s) used.

The watkins method is mainly of use with emulsions suited to development by inspection. It is of great use in making lith negatives, or, somewhat, in making lith-prints. Sadly, in a developer containing two developing agents, the temperature coefficient loses significance when temperature varies much from 20 C.

Developing AgentC
Metol1.25
Paraminophenol1.5
Ferrous oxalate1.7
Pyrogallol1.9
Metol-hydorquinone1.9
Hydroquinone2.2 to 2.8
Catechol2.8

Some developing agents change activity with temperature — hydroquinone loses activity at low temperature. (Jacobsen, p.67)

Temperature coefficients vary slightly with emulsions. Concentration of developer has little effect.

The temperature coefficient of a developer is the increase in speed of development for a 10F increase. A TC of 2 means that a developer works twice as quickly at 75F as it does at 65F — typical Coefficients from the mid-century were: 1.8 for MQ developer(D76), for fine-grain developers (D23), and 2.3 for super-fine grain developer.

Note: pyro and amidol do vary by amount of grains per ounce. Bromide alters the pyro factor.

Compensating Timers

Temperature control is better than a compensating timer. Keeping agitation in line, changes of developer is more important to critical processing than is time-temperature duration. Build tray rockers, insulated, water-jacket trays with lids instead.

But, if you are interested search: Tundra. DLG. ProcessMaster.

[file]
CARP Fishing

Writing about drying prints reminded me about Pakosol and drum drying of prints, even dye transfer prints.

Even though Kodak Dye Transfer paper was much thicker than most darkroom paper, it would still curl. This curl meant that retouching was harder, since retouching was the most common purpose behind making a dye transfer, we were making the process longer, and more expensive using any but the most efficient drying method.

I have, over many years, grown to test someone’s knowledge, trying to compare what they know by practice to what they know through overhearing; their gossip BS quotient. I did this because I hired people for labwork; since I didn’t have the patience to give them trial time, I talked, a bit, like an idiot, or I questioned them like their life depended upon correct, quick answers. In a way, it did.

A comment made to a Dye Transfer Group was that we used Pakosol when glossing our dyes. Not exactly true, although it went unchallenged. People too polite, or just didn’t have enough experience, which they realized. Only one of the 100+ talkers had lab experience; he was at BK+L. He may have known the use was to wipe the borders, not immerse the print for glossing, since those of us making dyes commercially were sending them to retouchers.

Wiping to White — clearing the borders was common practice; it carried over to “flashing white” to type Rs & Cibas. Art Directors expected R(review) prints to have borders they could write/markup.

Dye transfer died because of bullshit trumping behavior. As in most idler things, most people just doodle away, preferring to talk about it; so too in the camera counter world. People learn by shopping means they learn little of use beyond the sales chatter. The gossip review. The Efke Orthomatrix sold less than a third of what was made. No one bought more than 10 boxes! US importers basically stiffed the exporter.

Amateurs want a claim to meaning. This explains, rather, it justifies the costs of an in-effective hobby.


Back to print flattening: the solution is hygroscopic — something like dilute glycerin. Pakosol had glycol in it.

kodak’s 50s advice about drying paper flat.

dampen backs and re-dry between blotters under pressure.

Print flattening solution works well by slowing drying in winter atmospheres

[ from yesterday: https://webionaire.com/2023/04/02/drying-fiber-prints/ ]

Drying Fiber Prints

baryta. Ferrotyping. Screen dryers. Air-box dryers. Heat- press. Pako drum dryer.

paper curls as it drys. Take it from very wet to very dry quickly enough and the gelatin (emulsion) shrinks more than the paper (base).

Use the slowest way of drying your print. Fiber darkroom paper will not air-dry flatter than when it comes out of the box in the darkroom. If you need to use strong easel pressure during exposure, that paper may have a defect.

Paper-makers dry paper in an air-box. In labs, during last century, we used large heated rotating drums. These had canvas belts which could become stained, hence, the need for the Anselites to dry on screens. Screen drying racks came from the silk-screen and fine-print maker studios of that time. Many darkroom makers hung prints from clothes lines, like they did with their film. Let it air-dry in a damp basement.

All things considered, it worked well enough. Recently, discussions arise over changes in methods of the years. Large drums are gone; screens remained. Crinkle edges abound. We no longer dry under pressure and controlled temparture. Kodak made drying rolls suitable for prints smaller than 11×14 — they work well. So does ironing the print after it drys down to “damp” — iron from the back on lowest heat setting.

Or, you can flatten the dried print in a heat-press. (such as used by silk-screen printers)

Videos:

paper maker drying box

Getting from the question to the respondents — why the need for experts brings out some of the worst.

This is the place WileyPhoto references. He had prints there, that he reclaimed. At various tellings, they were Cibas, or Fuji Crystal … depending upon the need to convince, the topic at hand.

His legend also has it that they were printed such way as to make use of “fading” /// They were also up for “decades” … yet, this retrofit was in 2009, so the prints went up after that. The frames were also made by Wiley, in his very own garage.

I have never sold a print, then reclaimed it. Perhaps a vanity showing is what Mr. WileyPHoto had. The work was on loan, never sold. People visiting the lawyer, think the work was bought. This makes it seem valuable, not mere decor on loan. The work is hardly remarkable, like most decor, it must accommodate, blend into the background. Most of the work in the lobby is BW; that in the offices is by some of the lawyers — their fishing trophies.

This serves as an example of expanded importance. A puffery. Some small thing used to build many big things.


Formulas: Print flattening and for Ferrotype polish

Glycerine USP60ml (or) 125 ml
Add Water to make1 Liter
at 60ml, soak print for at least 5 min.
at 125ml, dampen BACK of print, using sponge. This is the better method
Print Flattener – formula

Paraffin0.7 gr
Carbon Tet32 ml
Plate Polish: Paraffin base

Benzol (FLAMMABLE)125ml
Yellow Beeswax2.7 g
Plate Polish: Beeswax base

the instruction for making the Beeswax included the warning not to make or use around burning cigar or pipe.

These formulas are from the 40s — notes from Kodak, Haloid, and Defender, all makers of silver papers(AgX)
