nutshell: Masking

an overview of masks: what they are; what they do. Masking is selective dodging.. consider it a precise, custom, graduated neutral density filter. Masks are most often used this century to alter contrast of B&W film. They also increase local contrasts, thereby altering edge effects making a print appear sharper with more gradations. These are the “unsharp masks (USM)”

In last century, during the growth stage of masking, they were used in color processes to alter, and correct contrast and color. Masking increased the contrast of the magenta and yellow, overcoming deficiencies, impurities of colorants.

If the original transparency isn’t underexposed, and the contrast of the scene is low, no masking is required.

Films I have today for masking: Ilford PanF (120). Ilford Delta 100 (4×5 & 8×10). Ilford Ortho+ (4×5, 8×10, special roll). Note the Ilford weight. I do, and it makes me nervous, since Ilford hangs on the interest of real estate ventures in a country of short term values.

From the past; more for the Rosetta stone. Translating data sheets. Why that film/developer was made.
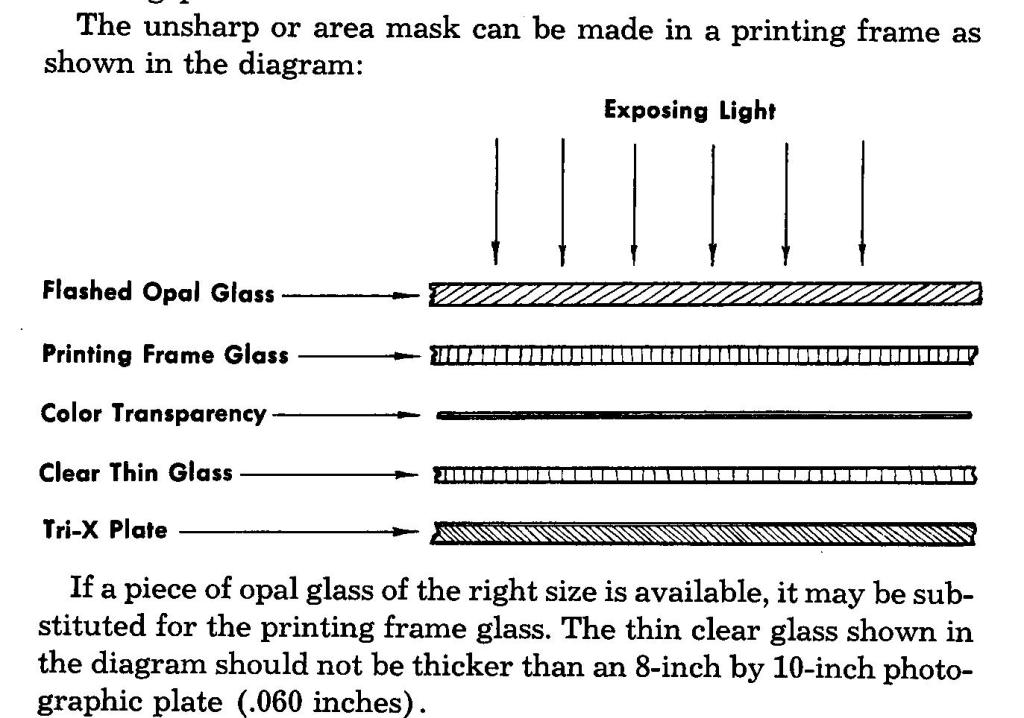
From the past, The mask film used was Tri-X Plate. Masks were made using film available. No special film.

The layout, exposure configuration was typical Kodak method used and taught for over 40 years.

Pan Masking film in Versamat — was the standard method at the end of the Kodak Dye Transfer era.

Masks should never be greater than 40%. Coated (APO) lenses require higher percent masks.

The appearance of color swatches in separation negatives is best indicator of correct mask exposure.

Most of the original guidance assumed the use of the Standard Light.


Developer for masks, like those for seps should be non-staining and not “fine-grain” solvent type. It is easy to recommend DK-50, DK-60a as best options, even this decade. For ready mix, try HC-110 one-shot. All masks and seps should be processed following a one-shot protocol. Use the mixture one time and discard. I use fresh developer for each sheet of film.

FilterUse
F- 29 RedRequired
N- 61 GreenRequired
#96 Neutral density: 0.10 / 0.30 / 1.0Strongly recommended. Equalize exposures. Reduce reciprocity differences.
#33 Magentaoptional
#15 Yellowoptional
Filters for (color) masking

Be assured that masking cannot make a color that the dyes, if mixed outside the system, cannot produce. This is why we always tried for better and better dyes (colorants). To correct all the cross-talk of dyes, six masks are needed. Contrast of masks is proportional to errors of colorants being modified.

compensate blue and green in CYAN2 masks
compensate for MAGENTA2 masks
compensate for YELLOW2 masks
the gammas must be corrected for each change in original color (transparency). If the chrome’s emulsion or processing change, a new configuration of correction masks would be calculated. [see Friedman for method ]

Not a realistic effort. Particularly since most images/ viewer sets can’t discern the improvement in real world conditions.


MASKING COLOR NEGATIVES

footnote for ongoing readers: notation on confused Large format masking board:

board note: CN[C41] film is designed for printing using a ‘hot’ light onto a color print [RA4]. BW films are more sensitive than the intended color paper. Recent discussion has much alteration discussion. What they are achieving is on this blackboard exercise.

Removing the “Orange” mask: If you want this brightest color to have a neutral hue, you need to expose, such that Dred = Dgreen = Dblue = 0.9, i.e. a uniform gray strip with D = 0.9 will be the brightest neutral color you can create. With extra exposure you can then reach all colors in the range (Dred = 0.9, Dgreen = 0.9, Dblue = 0.9) + (ΔDred, ΔDgreen, ΔDblue) with ΔDred ≥ 0, ΔDgreen ≥ 0, ΔDblue ≥ 0.
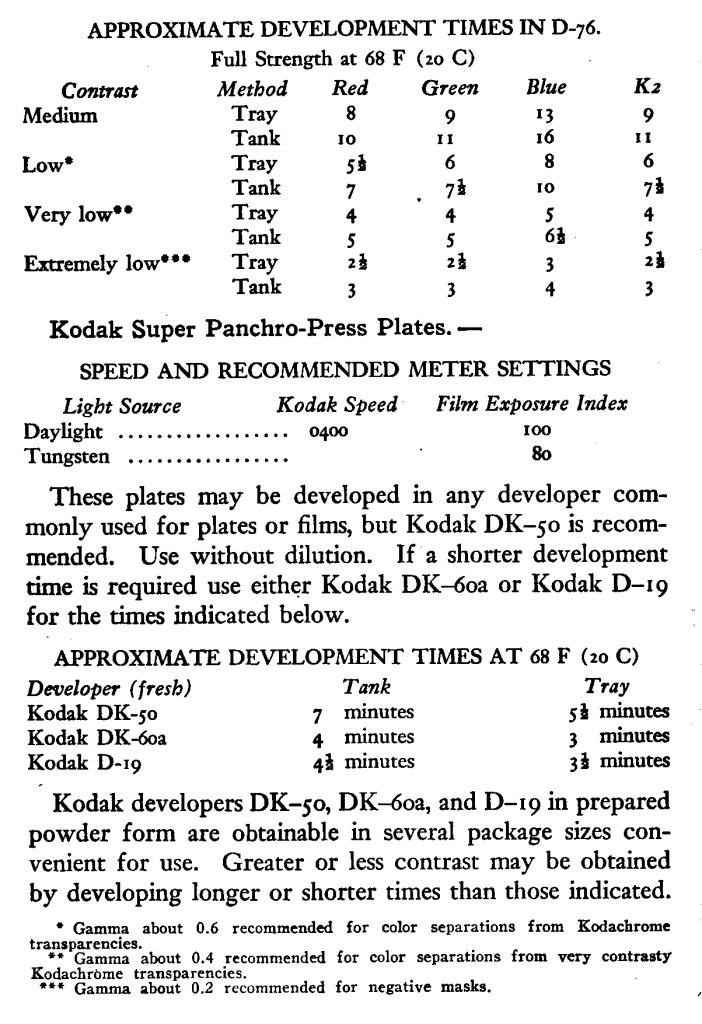
1950.. D-76 the standard developer for separation negatives. Its alternates were the DKs. See the footnote above for target gammas.

There was no magic in separation negatives. It has always been a balance between exposure types, filters, film + developer + agitation method.

I rarely used Super-XX as a sep film; only when clients required it. And on a small year, I made around 200 first prints – this, during my first 5 years working.
Labnotes–Feb 24

 two ways of minimizing dye bleeding. We always dried our 
prints on a drum dryer. The other was not to condition paper for more 
then thirty minutes. Any left over paper was used for test prints. — dye transfer

Other notions collected this week

Early reference made to Three-color methods and processes with special detail about Jos-Pe and Pinatype.

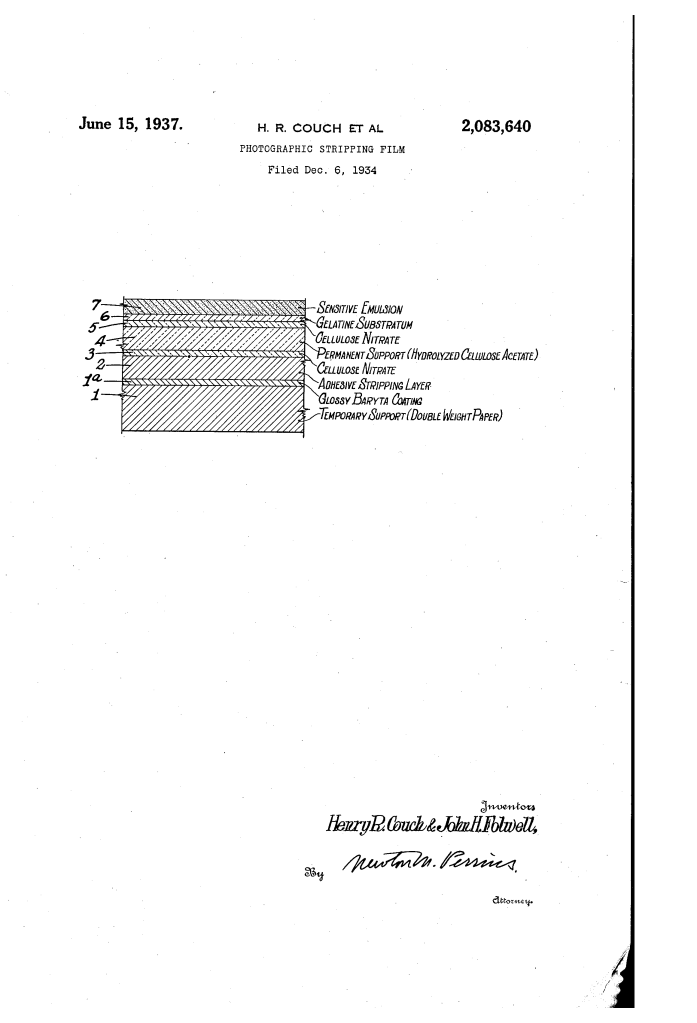
I’ve been going through notes on matrix making along with tanning methods: why developer replaced bleach.

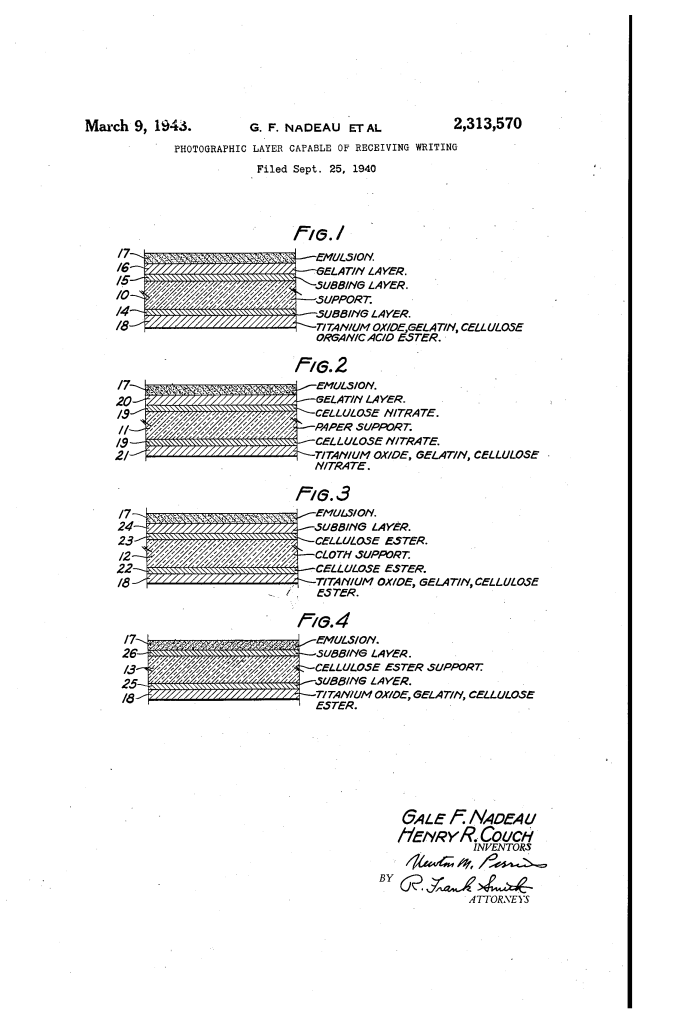
finding the person behind the process leads to much more information about the process. These two people were the keys to Kodak’s emulsion coating discoveries. Nadeau and Starck are on many patents that would be key to making matrix film or Flexichrome emulsions.

While digging into the past there is the challenge of staying focused, limiting attention, and missing serendipitous materials such as:

Easy Assembly Color

handmade color was once the main way of making a color print. At first, obviously, the first color photograph was made by a technician — not purchased, but made. That process was an assembly process. The print was made by layering separate images until they formed the final single print. This was the synthesis step in a “multi-color” process.

Assembly systems are divided into “roll-up” and “lay-down” methods. Was it a ‘dye’ or a ‘pigment’ that is being assembled. They could also be classified as ‘direct’ or ‘indirect’ transfers. These processes are more mechanical than any other way of making prints. The whole direction of the Kodaks was to do the assembly at manufacture time: the integral, type C process. The key researcher for Dye Transfer was moved from dye transfer to type C print work by 1961.

The two most successful systems, those have large enough commercial backing to sustain many users, were Carbro, and Imbibition printing. Imbibition prints were more often known as Dye Transfer, and Wash-off-Relief.

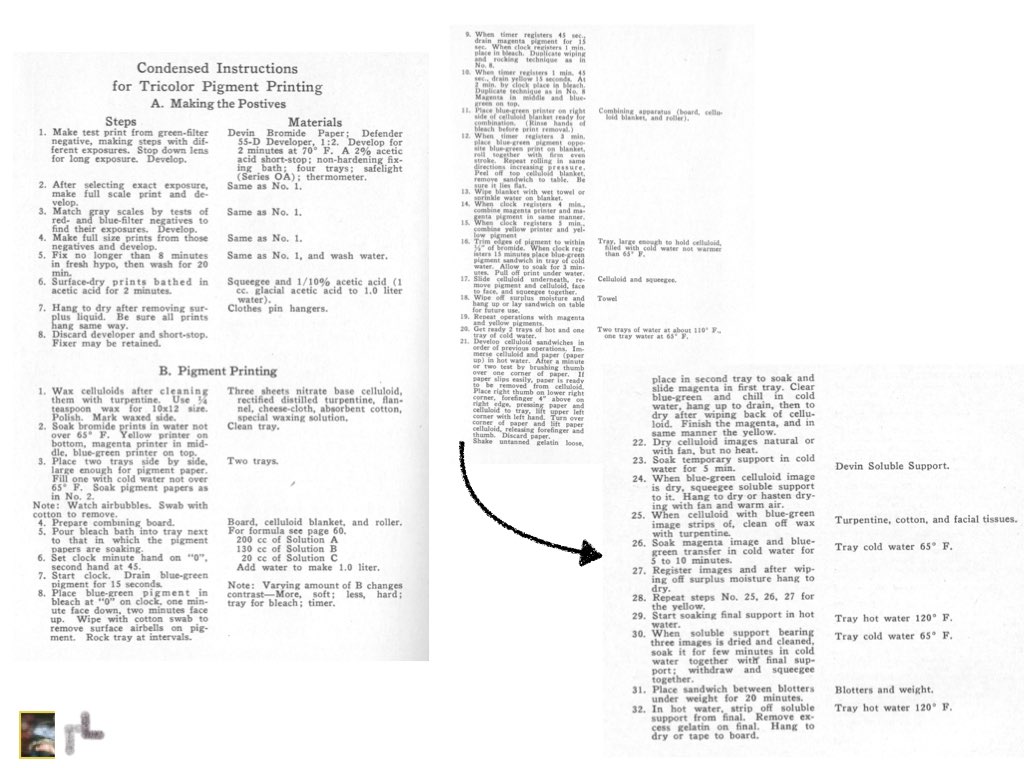
Either process was time consuming, involving many steps with moderate to high skill needed at each. The difficulty lay in the combining of the steps in such a way as to be able to solve more problems than you created. Each stage offers choices; making the best choice comes from having a nice overview firmly in mind.

Either process could be described as consisting of very few steps. Leave out enough and we could just say: expose then print.

Teaching was always a balance between showing, telling, and knowing what to leave out.

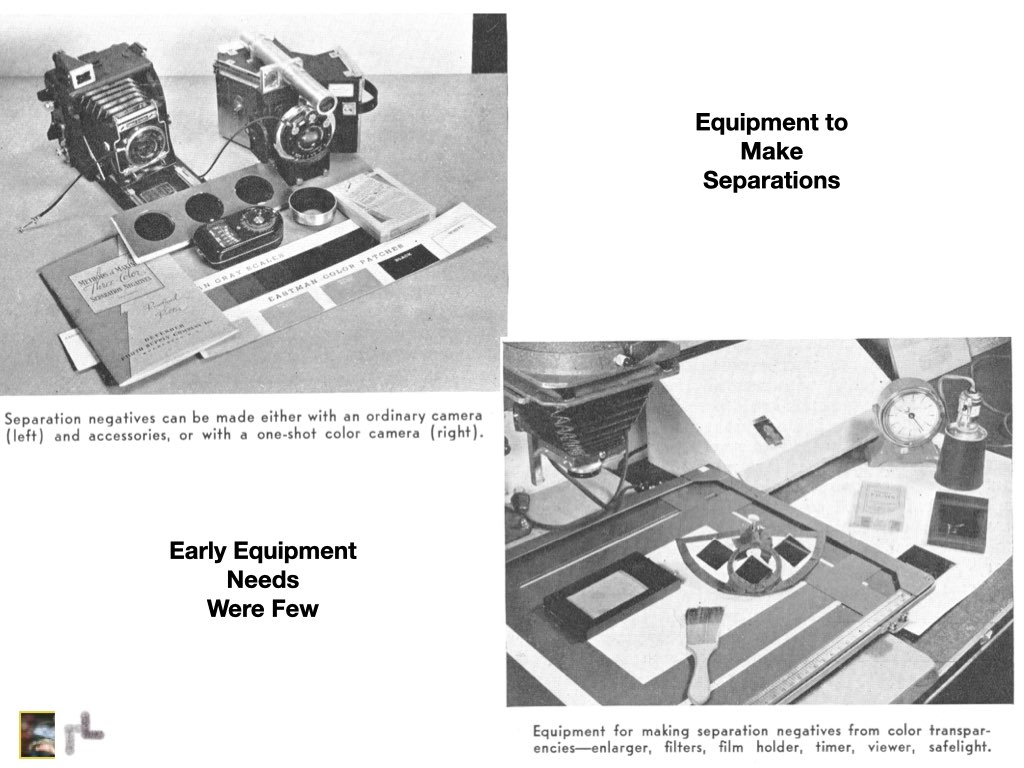
Early Equipment was primitive by what anyone working in this century would have:

The processes compared in “follow list” form make their relative complexity obvious. Obvious about why Carbro was replaced. And why Kodak spend so much effort to follow the imbibition path broken by Technicolor.

The biggest step to take these days is: make tissue, or make matrix film. The history of assembly has returned to the carbon route. Firstly because the alt photography community began it as part of the 60s photography surge.

I’ve posted enough over the past years for someone to be able to make matrix film. There are enough webpages and specialty groups for anyone to be able to make their own carbon tissue. Carbro is a different, but easy enough alteration to carbon printing. Just about any soft emulsion photopaper can be used. Bromoil is harder to make than a carbro.

To begin. Begin. Make your own outline. Start with the minimum, not the maximum. Go faster than you feel you can. Make more mistakes than you want. If you read for an hour, print for three.

Assembly isn’t easy until it is done.